Palette Mapping

How can I modify an image to match a palette?
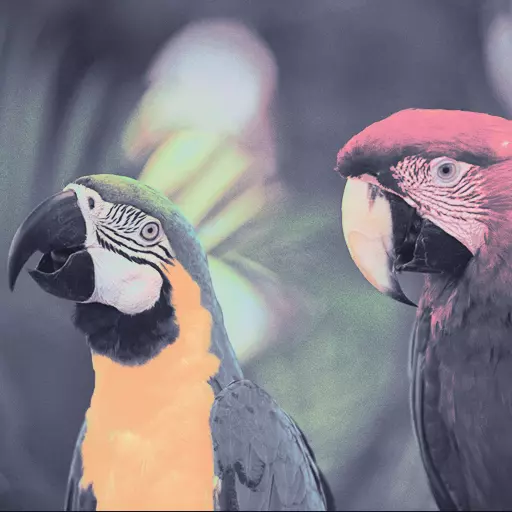
Note: For these demonstrations I'm using the Catppuccin Mocha palette with an image from the Kodak Lossless True Color Image Suite
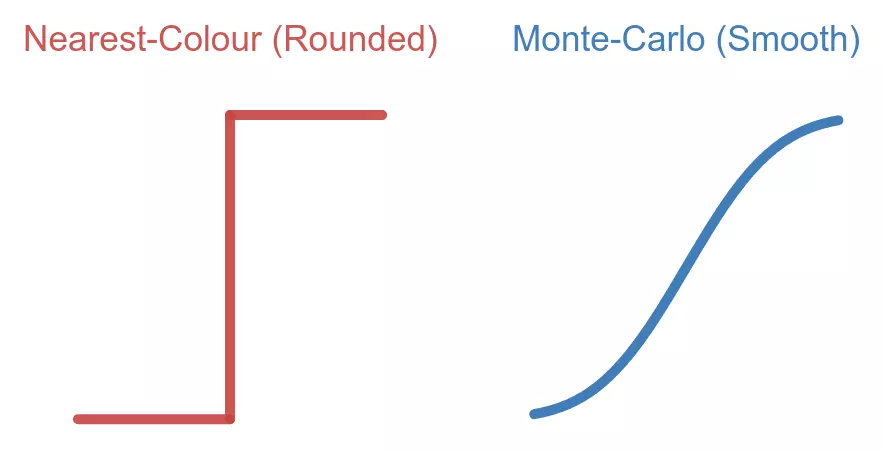
Nearest-colour quantization
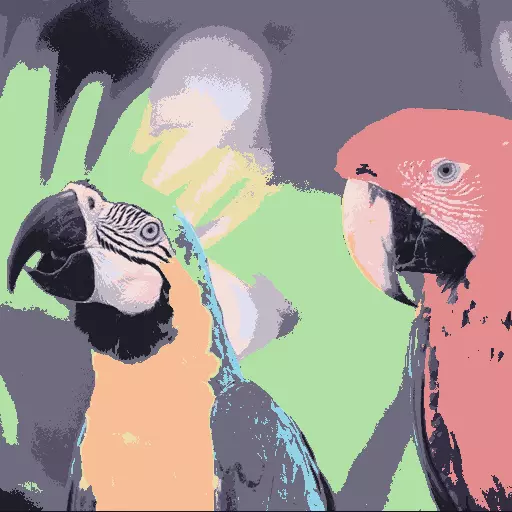
Nearest-colour quantization is the simplest technique, just set each pixel to the closest colour in the palette.
It guarantees that the image perfectly matches the palette, but it often destroys any details in the image.
Dithered quantization
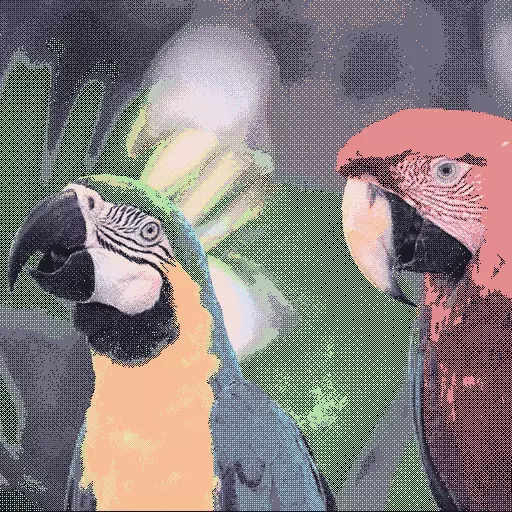

Dithering involves picking the closest colour and spreading the error (difference between old and new) to neighbouring pixels.
Every pixel is in the palette and more details in the image are preserved, but the image is now very noisy.
Blurred dithered quantization
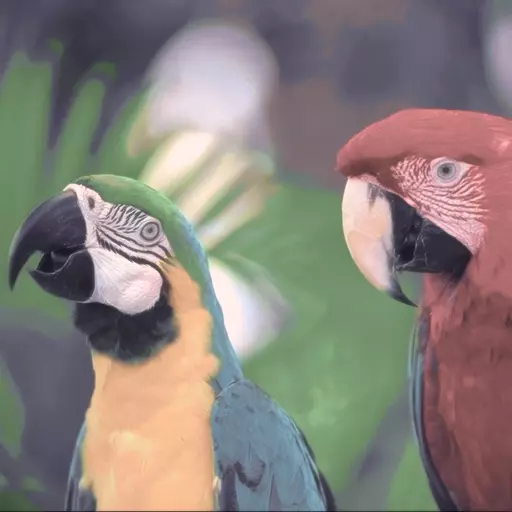

The noisiness of a dithered image can be reduced by blurring it.
(here I've applied 1px gaussian blur and then 20it mean curvature blur)
Then I overlay the original image's luminance at a lower opacity to keep details.
This results in an image that matches the target palette pretty well but tends to appear hazy.
Gradient mapping


Using the image's luminance as the index of a gradient map usually has good results, but it's limited to a basic gradient.
(here I'm using a clockwise HSV gradient from "Crust" to "Teal")
Monte-carlo palette mapping

convert [INPUT IMAGE]
       -duplicate [SAMPLES]
       -attenuate [BLENDING]
       +noise Gaussian
       -quantize LAB
       +dither
       -remap [PALETTE IMAGE]
       -evaluate-sequence Mean
[OUTPUT IMAGE]By adding a small amount of noise to each pixel and finding the closest colour, the resulting colours will be random. The probabilities of these colours depend on the distance to each colour in the palette.
This is only marginally better than the nearest-colour method; It's still very strict about colours being in the palette.
But we can repeat the process several times and average them together. During this process, the pixels will converge to some linear combination of the colours in the palette. The amounts of each colour depends on the distance from the original colour. This results in gradients being preserved as colours are continuously transformed.
This kind of method using random samples that converge to an "eventually correct" state is called a Monte Carlo method, hence the name.
This is also equivalent to applying a gaussian blur to the colour-space representation of the nearest-colour map (which is, itself, a Voronoi map in the colour-space).
The imagemagick command included here has some parameters that need to be set beforehand.
-
[INPUT IMAGE]and[OUTPUT IMAGE]are pretty obvious. -
[PALETTE IMAGE]is an image containing the exact colours for the palette you want. -
[SAMPLES]is the number of runs to be averages together. It has a pretty simple tradeoff: more samples means less noise, but also more computation. -
[BLENDING]affects the strength of the noise, and therefore, inversely, how closely the resulting image will match the palette. (0 = nearest-colour, 1 = default, 2+ = closer to original)
Making it (a lot) faster!

convert [INPUT IMAGE]
        [HALD CLUT] -hald-clut
        [OUTPUT IMAGE]
The problem with an eventually correct algorithm is that "eventually" can take a very long time. It takes my machine about 5 minutes to filter a 1920x1080 image at 512 samples.
Luckily, we have an out. This filter is a "pure function" because
the resulting pixels don't care about any surrounding context. That
means we can compute all the answers beforehand and save it for
later as a
Lookup Table
in a special image called a
HaldCLUT
by applying the filter once to a template (with imagemagick, use
HALD:8 as the input image).
Now, the filter only needs to look up the answers from the lookup table. This is a lot faster, the same wallpaper now only takes 1.6 milliseconds.